Mastering Pom Pom Maker: Step-by-Step Guide for Beginners
Pom poms have been a delightful craft for generations, bringing vibrant colors and textures to various DIY projects. Whether you’re adding them to accessories, home decor, or clothing, pom poms are a fun and versatile addition. If you’re new to using a pom pom maker, this guide will walk you through the steps to mastering this simple tool.
What You’ll Need
Before diving into the process, ensure you have the following materials at hand:
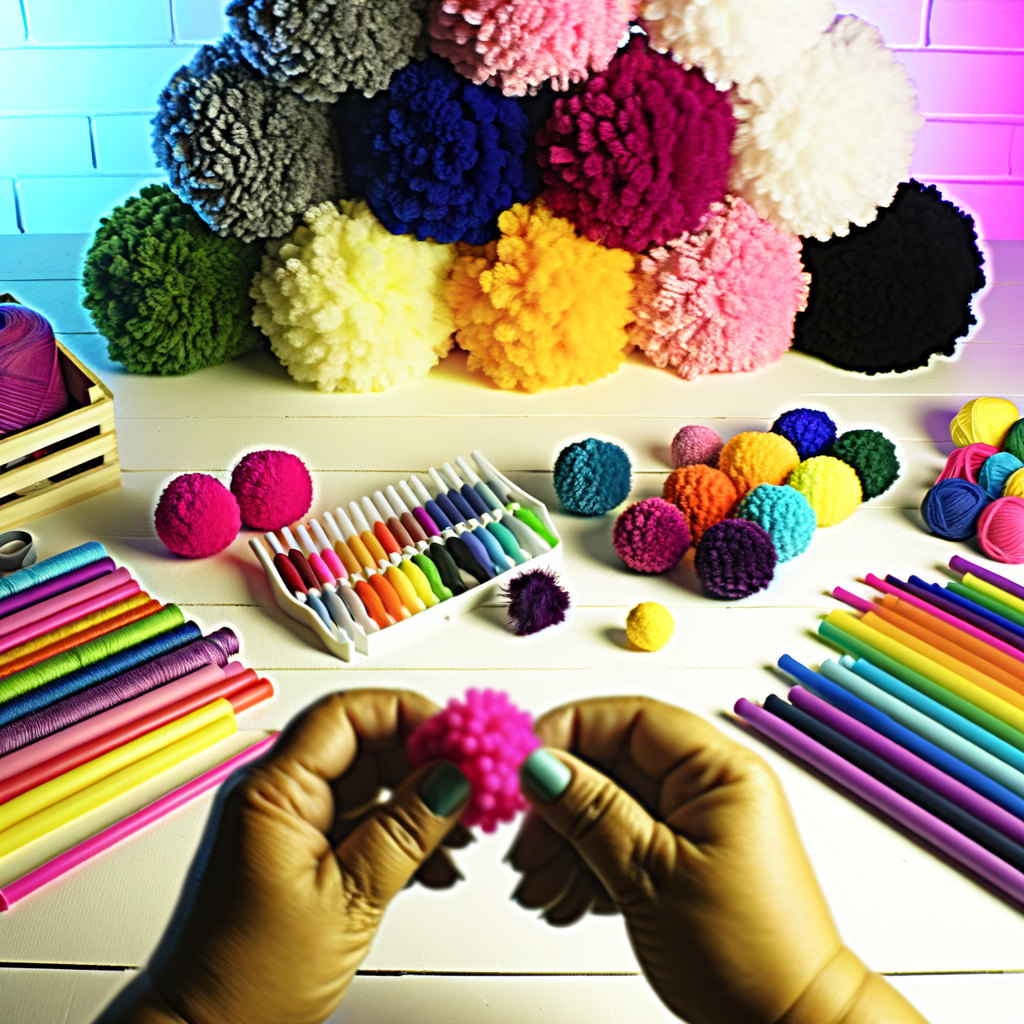
- Pom pom maker: Specifically designed for creating consistent and perfect pom poms. They often come in various sizes for different pom pom diameters.
- Yarn: Choose yarn in your favorite colors. Thicker yarn works faster, while thinner yarns can create denser pom poms.
- Sharp scissors: Essential for trimming and shaping your pom poms.
Step-by-Step Guide to Using a Pom Pom Maker
Step 1: Preparing Your Pom Pom Maker
Most pom pom makers consist of two halves that hinge together. Open your pom pom maker and set the two halves aside. Each side has two arch arms where you will wrap the yarn.
Step 2: Wrapping the Yarn
Begin by wrapping the yarn around one arch arm of the pom pom maker. The tighter and more uniformly you wrap the yarn, the fuller and more even your pom pom will be.
- Consistency is key: Wrap the yarn evenly across the arm, covering every bit of space.
- More wraps, fuller pom: For a fluffier, denser pom pom, wrap the yarn multiple times around the arm.
Once you’ve wrapped one side to your satisfaction, cut the yarn and repeat the process on the second arch arm of the opposite half of the pom pom maker.
Step 3: Closing the Pom Pom Maker
After wrapping both sides, close the arch arms back into the center of the pom pom maker, ensuring both sides are securely closed. This step compresses the yarn, forming the shape you need.
Step 4: Cutting the Yarn
This step requires precision and care:
- Hold your pom pom maker firmly in one hand.
- Using sharp scissors, carefully insert the blade between the two halves of the pom pom maker and cut the wrapped yarn along the edge. Repeat this for both sides.
Be sure to hold the pom pom maker securely to prevent the yarn from slipping out.
Step 5: Tying the Pom Pom
Now that your yarn is cut:
- Cut a separate piece of yarn (about 6-8 inches) to tie around the middle of the pom pom.
- Insert the yarn between the two halves of the pom pom maker, ensuring it’s centered and secure.
- Pull tightly and secure with a strong knot. This ties all the pieces of your pom pom together.
Step 6: Releasing the Pom Pom
Gently open the arch arms on both sides of the pom pom maker. Carefully pull apart the two halves to release your completed pom pom.
Trimming and Shaping Your Pom Pom
Your pom pom will likely need some trimming to achieve a perfect sphere.
- Trimming: Using sharp scissors, trim the edges of your pom pom to create a uniform shape. Turn it in your hand as you trim to ensure evenness.
- Shaping: Roll the pom pom between your hands to fluff it up and identify any uneven spots that need additional trimming.
Advanced Tips for Perfect Pom Poms
Experiment with Colors
Creating multi-colored pom poms adds a unique flair to your projects. Here’s how:
- Wrap different colored yarns around each arch arm for a striped effect.
- Combine colors randomly to create a confetti-style pom pom.
Mixing Yarn Types
For added texture and dimension:
- Combine yarn of different thicknesses.
- Use specialty yarns like metallic or variegated colors.
Creating Different Sizes
Most pom pom makers allow for making various sizes. Follow the same steps above, but adjust the amount of yarn according to the size of the pom pom:
- Large pom poms: Wrap more yarn for a fuller look.
- Small pom poms: Use less yarn, ensuring to still cover the arch arms fully.
Common Mistakes to Avoid
- Not wrapping enough: Under-wrapping results in sparse pom poms that may fall apart.
- Tying too loosely: Ensure the middle tie is tight to prevent the yarn from unfurling.
- Poor trimming: Inconsistent trimming can lead to uneven pom poms. Take your time to achieve a smooth, even surface.
Incorporating Pom Poms into Your Crafts
Pom poms can be used in a multitude of ways:
- Home decor: Enhance pillows, add to garlands, or create festive wreaths.
- Clothing accessories: Attach to hats, scarves, or bags for a playful touch.
- Party decorations: Use as cute party favors, table centerpieces, or cake toppers.
Conclusion
Mastering the art of using a pom pom maker is a fun and rewarding endeavor for any craft enthusiast. With a bit of practice, you can create perfect, fluffy pom poms in no time. Whether you’re using them to brighten up home decor, add a personal touch to accessories, or just for the joy of creating, pom poms are a delightful addition to your crafting repertoire.